November 23 2008
sudo NSTasks with Mac OS X's Security framework
Recently I found myself needing to perform root-level operations. Two simple things. Writing to a directory that's root-owned and not group-writable (drwxr-xr-x root:wheel). And running a shell task with sudo. I had no experience with Mac OS X's security framework before this, so now with the operations working, I wrote up a quick Cocoa application and tutorial to help anyone else encountering these same issues. Apple's documentation and sample code are great, but I had trouble understanding how to use NSTask to perform the operations. Two caveats. I'm using 10.5, so the Xcode project is 3.1 and the security calls might have changed since 10.4 or before. Moreover, while I think my implementation follows Apple's recommended solution, I might be wrong. Someone let me know if that's the case.
Mac OS X's Security framework revolves around authorization. An application must obtain the user's authorization, through the familiar name/password dialog, to perform privileged operations. Privileged operations aren't necessarily root-level ones. They might be application-specific tasks, like viewing payroll information. By requiring authorization, an application can limit the user's ability to access confidential information or tasks. When the operation is a root-level one, Apple cautions developers to take special care to structure the application to minimize security risks. They recommend the code performing the root-level operations be factored out into a separate tool. The problem is the tool needs to run as root, but to run a program as root, the caller must be root. Apple's solution to this problem is AuthorizationExecuteWithPrivileges or AEWP as mailing lists refer to it. The method allows a non-root application to start another application as root. Apple thinks the best way to use this method is to start the tool in a non-root context and then have the tool call itself with AuthorizationExecuteWithPrivileges. That way, the caller application is never root, and the security exposure is minimized. Apple dives into much greater detail in their documentation; read through it before deploying an application with root-level operations. Be sure to check out their sample code: BetterAuthorizationSample and AuthForAll. (For the more ambitious, take a look at the BetterAuthorizationSample's Design and Implementation Rationale.)
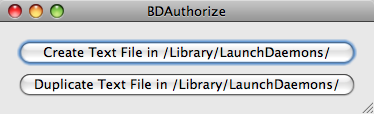 I called the project BDAuthorize. It's a simple UI with two buttons: "Create Text File in /Library/LaunchDaemons" and "Duplicate Text File in /Library/LaunchDaemons". That folder matches the ownership and permissions I wanted to test. Under the hood is a helper tool that performs the privileged operations. The application creation is boiler-plate, but I'll go over the helper tool creation.
To create a helper tool in Xcode, I added a "Shell Tool" as a new Target ( "Project" -> "Add Target..." -> "Cocoa" -> "Shell Tool" ). I called mine "AuthHelperTool". I added "AuthHelperTool.m" as a new Objective-C class file, and then I dragged that file onto AuthHelperTool's "Compile Sources" under Targets. Be sure to remove the file from the analogous folder under BDAuthorize. Now the .m file will be compiled into AuthHelperTool. I wanted this target embedded in BDAuthorize's Resources folder, so I dragged AuthHelperTool under Products to BDAuthorize's "Copy Bundle Resources" under Targets. And as I didn't want to compile AuthHelperTool separately from BDAuthorize, I added AuthHelperTool as a dependency on BDAuthorize. To do this, I did "Get Info" on BDAuthorize under Targets, went to "General", and added the tool under "Direct Dependencies".
One subtle issue I ran into was credential caching. To test a sudo call, I tried it in Terminal before trying it in the helper tool. However, sudo caches credentials for a period of time, so my helper tool succeeded for a while and then started failing. To flush sudo's cache, just type sudo -k in Terminal. Flushing allowed me to test sudo calls myself and test the helper tool in a pristine state.
Although I performed a simple copy in this example, I could have easily run a launchd command like "sudo launchctl load plist" or any other root-level operation. The security framework takes a bit to understand, but structuring an application to leverage it is straight-forward.
Feel free to either download the zip file or browse the code on Google Code.